
1. Confirm your flight details
The first step in preparing for your airport check-in is to confirm your flight ticket details. The night before your departure, double-check your itinerary to ensure that everything is proceeding as planned. Take a moment to review the confirmation email you received from the airline when you purchased your ticket. This email should contain important information such as the flight number, departure time, and any updates or changes to your flight schedule. It is particularly crucial to check for any delays or rescheduling, as this may affect your travel plans, including any connecting flights.
2. Prepare your travel documents
Before heading to the airport, make sure you have all the necessary travel documents. For passengers over 18 years old, a valid driver's license or passport is usually sufficient for domestic travel. However, for international flights, a passport is mandatory. Remember to keep your travel documents easily accessible. You will need to present them at the check-in counter and the security checkpoint, so avoid packing them in hard-to-reach areas of your luggage.
3. Arrive at the airport early
To avoid any last-minute stress and ensure a smooth check-in process, it is advisable to arrive at the airport well in advance of your flight. As a general rule of thumb, aim to arrive at least two hours before your scheduled departure time. This will give you ample time to check in, drop off your luggage, and navigate through security. If you are traveling internationally, traveling with small children, or have any special needs or disabilities, it is recommended to arrive even earlier. This will allow you to complete the necessary procedures at a comfortable pace and minimize any potential delays or inconveniences.
4. Find your airline's check-in counter
Upon entering the airport, proceed to the main terminal and locate your airline's check-in counter. Airports typically have designated areas divided by airline, making it easy to find the counter corresponding to your flight. If you are unsure, you can check online, call the airport, or ask one of the airport employees for assistance.
[caption id="attachment_406786" align="aligncenter" width="600"]
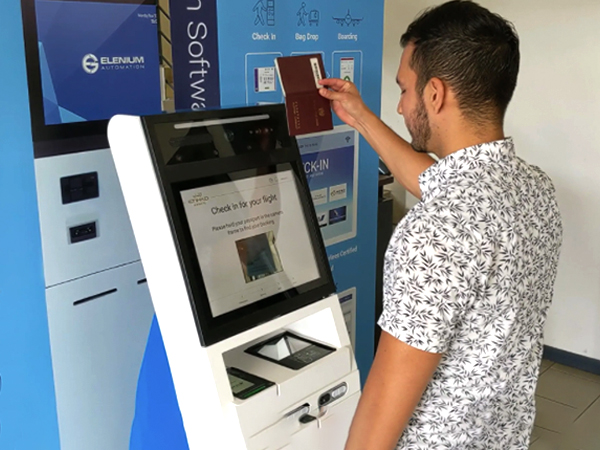 Airport Check-In Kiosk[/caption]
5. Check your baggage
Depending on your travel plans and the airline's baggage policy, you may need to check your bags. Most airlines allow passengers to carry one carry-on bag in addition to a personal item, such as a laptop case or purse. If you have additional bags or larger items, you will need to proceed to the check-in counter for your designated airline.
At the check-in counter, the airline staff will weigh your bags to ensure they comply with the weight restrictions. It is essential to check with your airline beforehand to familiarize yourself with the specific weight limitations and any potential fees for exceeding the allowed weight. If necessary, be prepared to pay any excess baggage charges at this stage.
6. Obtain your boarding pass
After checking in your baggage, it's time to obtain your boarding pass. Present your identification, such as your passport or driver's license, to the airline staff at the check-in counter. They will verify your identity, confirm your reservation, and print your boarding pass.
Many airlines now offer self-check-in kiosks, allowing passengers to check in and print their boarding passes independently. These kiosks typically require a credit card or reservation number to identify the passenger. If available, this option can save you time and expedite the check-in process.
7. Prepare for airport security
As you proceed to the security checkpoint, it's important to prepare for the screening process. Remove any outerwear, such as jackets and belts, as well as metallic jewelry or accessories, as these items may trigger the metal detectors. Check your pockets for any metal objects, including keys, and place them in the provided bins for X-ray screening.
Passengers over the age of 75 or under the age of 13 may not be required to remove their shoes. Additionally, if you are enrolled in TSA Pre-Check, you may be eligible for expedited security screening and not required to remove your shoes or laptops from your bag.
8. Security screening for electronic devices and liquids
In addition to personal screening, you will need to place your electronic devices, such as laptops and tablets, in separate bins for X-ray screening. Smaller electronic items, such as phones and e-readers, can remain in your bag but should be easily accessible for inspection if requested by security personnel.
[caption id="attachment_406788" align="aligncenter" width="600"]
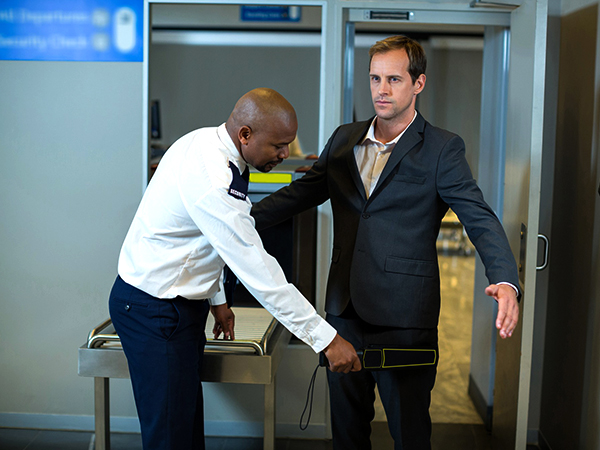 airport security check[/caption]
Regarding liquids, the 3-1-1 rule applies, meaning that all liquids, gels, and aerosols must be in containers of 3.4 ounces (100 milliliters) or less, placed in a clear, quart-sized plastic bag. Each passenger is allowed one bag, and it must be removed from your carry-on luggage and placed in a separate bin for screening.
9. Proceed to the departure gate
After successfully passing through security, it's time to make your way to the departure gate. Refer to your boarding pass for the gate number, and follow the signs or directions provided to locate your designated gate. It's a good idea to double-check the departure boards for any last-minute updates or changes to your gate assignment.
If you are unsure about the location of your gate, feel free to approach airport personnel or consult wayfinding signs for assistance. They will be happy to help you find your way and ensure that you reach your gate on time.
10. Enjoy the amenities and wait for boarding
Once you have arrived at your departure gate, take a moment to familiarize yourself with the surrounding amenities. Most airports offer a variety of shops, restaurants, and lounges where you can relax and enjoy refreshments while waiting for your flight. If you have time to spare, consider exploring the duty-free shops or taking advantage of the charging stations to power up your electronic devices.
As your departure time approaches, listen for announcements or monitor the departure boards for any updates regarding your flight. It's important to remain in the vicinity of your gate, as boarding procedures can begin earlier than the scheduled departure time.
11. Boarding the aircraft
When it's time to board the aircraft, listen for the boarding announcements and follow the instructions provided by the airline staff. Depending on the airline's boarding process, passengers may be called by boarding groups or sections. Ensure that you have your boarding pass readily available to present to the gate agent or cabin crew.
12. Final security checks and departure
Before the aircraft takes off, the cabin crew will conduct final security checks and provide any necessary instructions for the flight. Pay attention to safety demonstrations and familiarize yourself with the location of emergency exits and evacuation procedures.


